MIKROTIK DDNS NO-IP

MIKROTIK SCRIPT DDNS NO-IP
Hai un router Mikrotik e vuoi utilizzare no-ip come DDNS? Tutto possibile, scopri come in questo articolo.
In questa guida vedremo come utilizzare il DDNS NO-IP con i Router Mikrotik.
Componenti necessari:
- Un Router Mikrotik (es. Mikrotik hAP ax 2)
- Una connessione internet con IP PUBBLICO.
Livello difficoltà: Semplice
Apri in Winbox e sul Terminale incolla il seguente testo:
/system script
add dont-require-permissions=yes name=NoIP-script owner=abbio90 policy=\
ftp,reboot,read,write,policy,test,password,sniff,sensitive,romon source="{\
\r\
\n#----------SCRIPT INFORMATION-------------------------------------------\
--------\r\
\n#\r\
\n# Script: NO-IP script BY foisfabio.it\r\
\n# Version: 2.0\r\
\n# RouterOS v.7.14.3\r\
\n# Created: 13/05/2024\r\
\n# Updated: --/--/----\r\
\n# Author: Fabio Fois\r\
\n# Website: https://foisfabio.it\r\
\n# Email: consulenza@foisfabio.it\r\
\n\r\
\n\r\
\n#----------Change Values in this section to match your setup -----------\
-------\r\
\n \r\
\n# No-IP User account info\r\
\n:local noipuser \"foisfabio@gmail.com\";\r\
\n:local noippass \"1234567890\";\r\
\n \r\
\n# Set the hostname or label of network to be updated.\r\
\n:local noiphost \"foisfabio.sytes.net\";\r\
\n\r\
\n\r\
\n# Set Run Script Interval\r\
\n:local interval \"00:02:00\"; \r\
\n\r\
\n#----------MODIFY THIS SECTION AS NEEDED--------------------------------\
--------\r\
\n\r\
\n#----------------------------------------\r\
\n:local scheduleName \"NoIP-scheduler\"\r\
\n:local scriptname \"NoIP-script\"\r\
\n\r\
\n:if ([:len [/system scheduler find name=\$scheduleName]] = 0) do={\r\
\n /log error \"[NoIP-script] Alert : lo Scheduler non esiste. Creo lo \
scheduler\"\r\
\n /system scheduler add name=\$scheduleName interval=\$interval start-\
date=Jan/01/1970 start-time=startup on-event=\"system script run \$scriptn\
ame\"\r\
\n /log warning \"[NoIP-script] Alert : Scheduler creato .\"\r\
\n }\r\
\n\r\
\n#----------------------------------------\r\
\n\r\
\n# Online services which respond with your IPv4, two for redundancy\r\
\n:local ipDetectService1 \"https://api.ipify.org/\"\r\
\n:local ipDetectService2 \"https://api4.my-ip.io/ip.txt\"\r\
\n \r\
\n:local previousIP\r\
\n:local currentIP\r\
\n:local NoIPFullDomain \"\$noiphost\"\r\
\n\r\
\n# Resolve current DuckDNS subdomain ip address\r\
\n :do {:set previousIP [:resolve \$NoIPFullDomain]} \r\
\n\r\
\n# Detect our public IP adress useing special services\r\
\n :do {:set currentIP ([/tool fetch url=\$ipDetectService1 output=user\
\_as-value]->\"data\")} on-error={\r\
\n\t\t\r\
\n #Second try in case the first one is failed\r\
\n :do {:set currentIP ([/tool fetch url=\$ipDetectService2 output=user\
\_as-value]->\"data\")} \r\
\n \r\
\n }\r\
\n:if (\$currentIP != \$previousIP) do={\r\
\n :log info \"No-IP: Current IP \$currentIP is not equal to previous I\
P, update needed\";\r\
\n :set previousIP \$currentIP;\r\
\n :local url \"https://dynupdate.no-ip.com/nic/update\\3Fmyip=\$curren\
tIP\";\r\
\n :log info \"No-IP: Sending update for \$noiphost\";\r\
\n /tool fetch url=(\$url . \"&hostname=\$noiphost\") mode=https user=\
\$noipuser password=\$noippass;\r\
\n :log info \"No-IP: Host \$noiphost updated on No-IP with IP \$curren\
tIP\";\r\
\n } else={\r\
\n :log info \"No-IP: Previous IP \$previousIP is equal to current IP, \
no update needed\";\r\
\n }\t\r\
\n\r\
\n }"
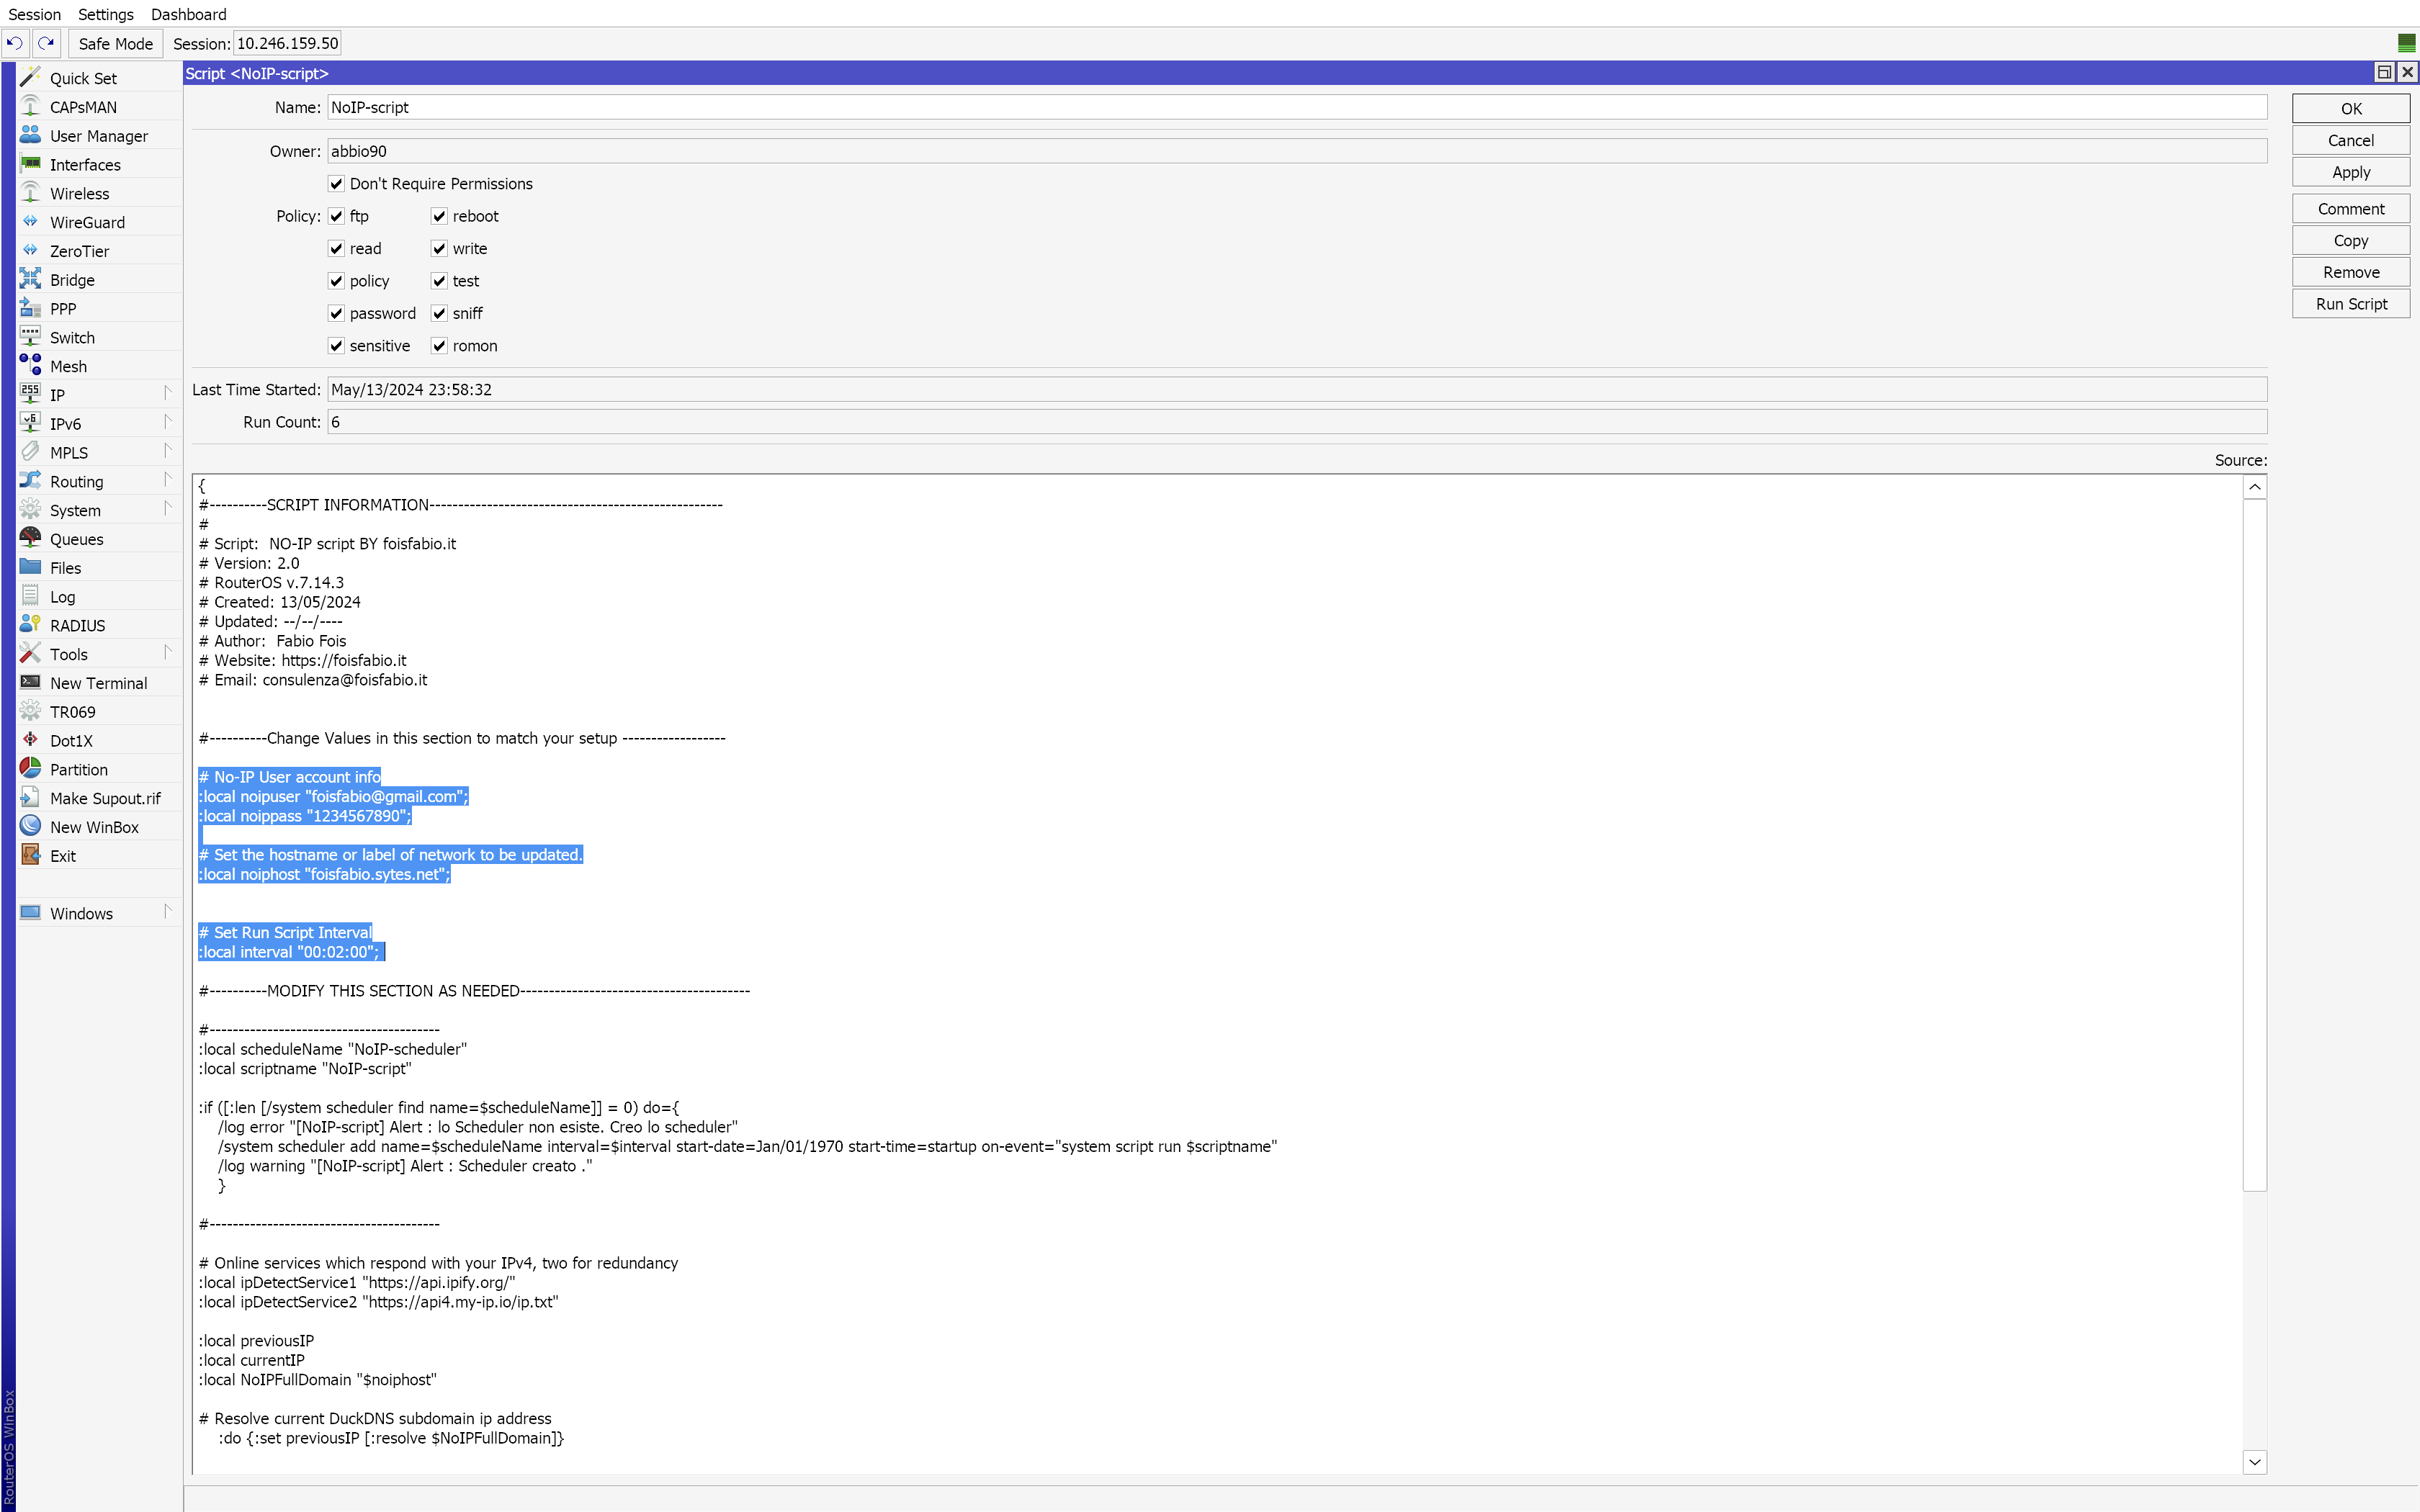
Dopo aver incollato il codice qui sopra, vai nel menù System, Script e fai doppio click sullo script chiamato: “NoIP-script“.

Sostituisci i campi evidenziati con quelli in tuo possesso senza corrompere la sintassi dello script.
Infine clicca su Apply e su Run Script.
Nei LOG dovrebbe apparire un messaggio che lo Scheduler è stato creato.
A sto punto attendi l’intervallo che hai specificato nel campo Interval e nei log apparirà il messaggio di check dello script che indicherà se l’ip è identico a quello presente al precedente Run Script, se fossse cambiato lo aggiorna sul dominio.
Ti è piaciuta questa guida MIKROTIK SCRIPT DDNS NO-IP
Scrivi il tuo parere nei commenti o contattami attraverso la sezione Contatti.
Puoi supportare foisfabio.it con una piccola donazione oppure commenta e condividi questo contenuto.
Hai riscontrato errori in questa guida?? segnalacelo tramite la scheda CONTATTI
Guida redatta da Fabio Fois.
Copyright © 2024 foisfabio.it | Powered by Fabio Fois
Quanto è stato utile questo post?
Clicca su una stella per valutarla!
Voto medio 5 / 5. Conteggio dei voti: 1
Nessun voto finora! Sii il primo a valutare questo post.


